


I use Claude Co-work as a research assistant, editor, and red-team. The ideas and errors are mine.
Way off-topic for a Sunday moment.
Thanks to pathological levels of ADHD and Can’t-Leave-Well-Enough-Alone-Itis, I have gone all the way down the coffee geekery rabbit hole. I roast my own beans on my rooftop once a week and have for five years, sourcing green coffee from around the world in cycles, chasing whatever is in season wherever it grows. I pull espresso on a hand-powered lever machine. I am, by any reasonable measure, too far gone.
I also have 3 kids who need to get ready for school in the same time it takes me to make everyone breakfast and get my wife and I out the door, so I need to balance the universe of flavor and texture possibilities with a realistic weekday workflow.
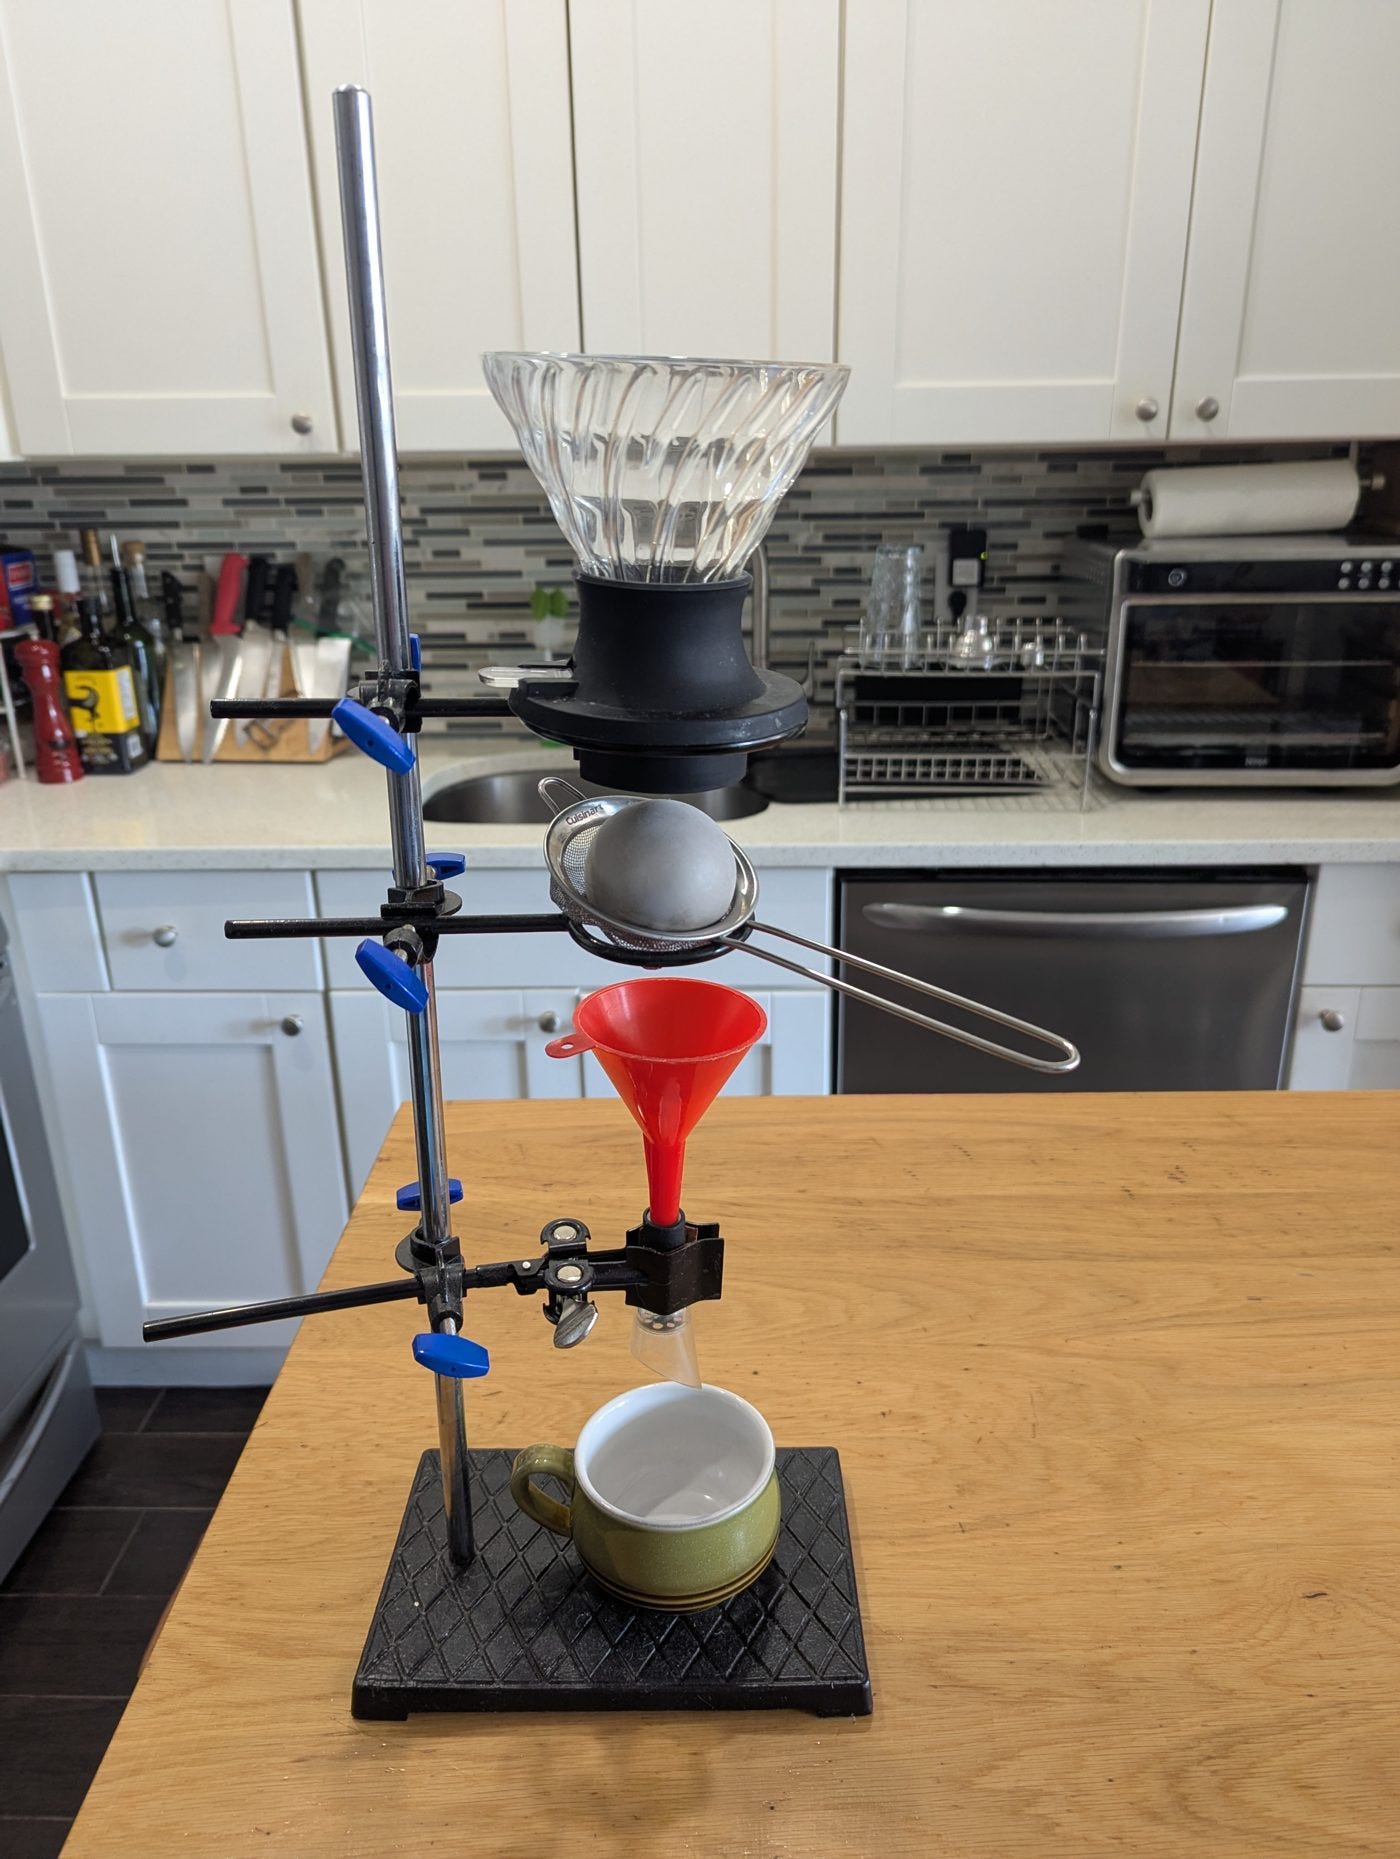
So believe me when I tell you that almost none of it is necessary. The single thing I wish more people knew about coffee is how accessible a world-class cup is: a championship-level brew is within reach of conventional, low-cost tools.
The method I’m about to describe has been my daily driver for the last 2 years. It is no fuss, takes less than 5 minutes end to end, and draws out deep, nuanced flavor and mouthfeel far better than finicky pour-over methods or my beloved espresso workflow, both of which impose themselves on the cup in ways this one refuses to. Unlike espresso and pour over, this method also needs no calibration for different beans. It gives exceptional results for syrupy African and Brazilian natural and honey process beans in the exact same way it conveys the clarity and fruit notes of Central American or Indonesian washed varietals.
The method comes from Tetsu Kasuya, the 2016 World Brewers Cup champion (Youtube link below). He called it the God recipe, then thought better of it and renamed it the Devil. His original runs on a contrarian move: partway through, you drop the water temperature, so the back half of the brew steeps cooler than it started.
My everyday version keeps his ratio but changes three things:
A simpler pour structure: one bloom and one steep instead of staged pours.
A gentler temperature drop.
No second kettle or cold-water step to fuss with.
Kasuya has no kids and can stage a championship pour in peace. I have three who need tending while the coffee happens, so I traded his finesse for something I can run one-handed and still get a cup worth drinking.
What you need
A Hario Switch (about $30). A cone with a valve at the bottom: open, it drains like a pour-over; closed, it steeps like a French press. One tool, two brews.
20 g of coffee, ground slightly finer than usual French press or pour over.
A kettle, and a way to hit two temperatures: 205°F / 96°C for the bloom and 192°F / 89°C for the steep (just off the boil, then rested a couple of minutes).
A measuring cup or scale to hit the pour weights.
(optional) A 600ml glass coffee server for decanting ($15)
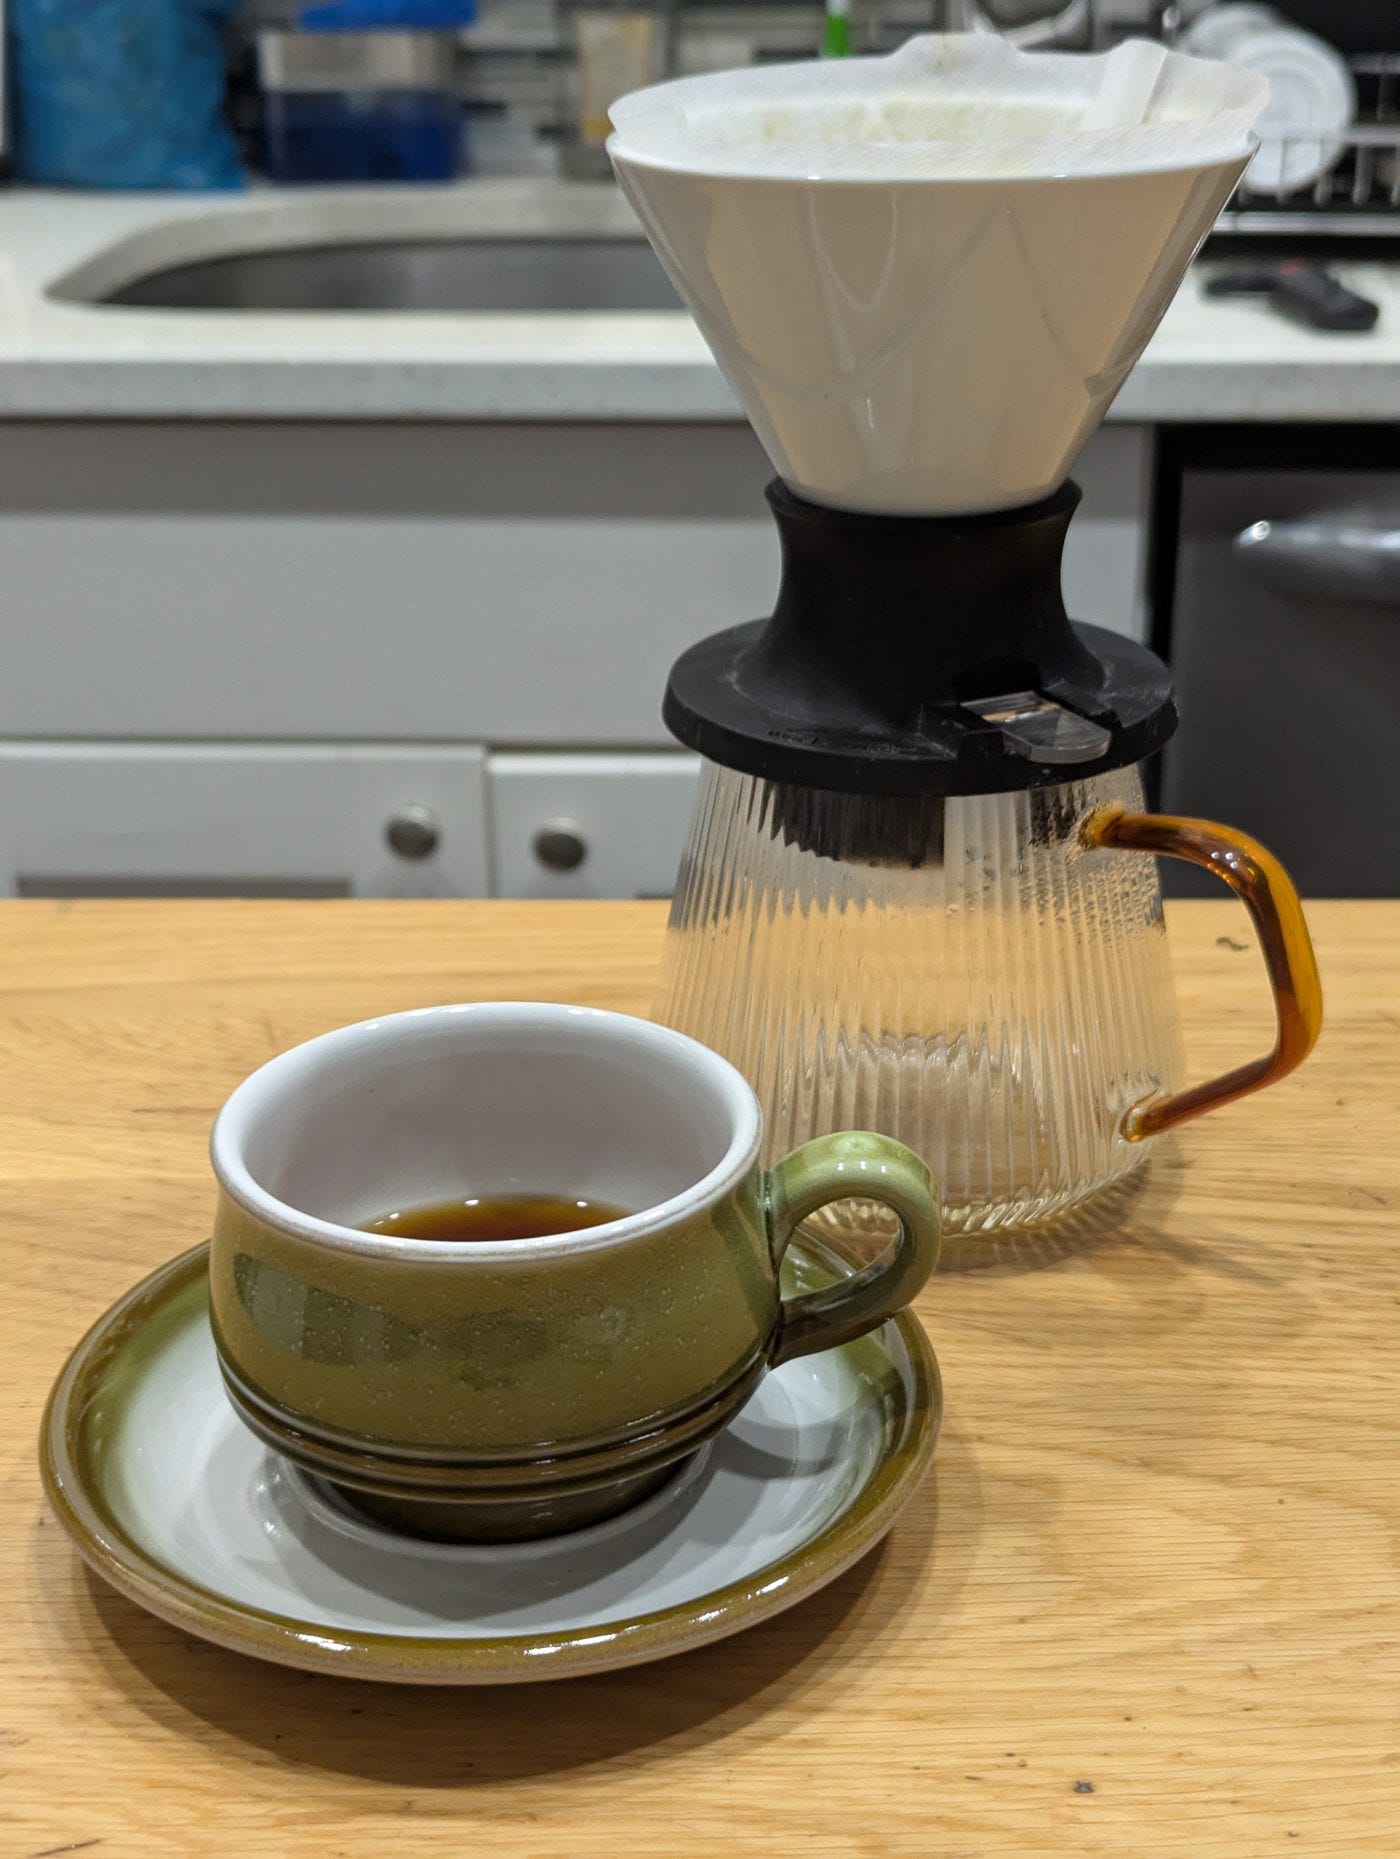
The cleverness is in the sequence.
The Method for a Hot Cup
The method has two phases.
A hot bloom that drains all the way through.
This grabs the bright floral notes from your beans.
Followed by a longer, slightly cooler 3 minute immersion.
The slightly cooler, longer immersion is similar to a French press in that it will draw out mouthfeel and rounder chocolate and caramel flavors. The lower temperature protects you from the more acidic and astringent notes that can turn a cup harsh and require milk or sugar to cover up.
Total water is 280 g to 20 g of coffee, Kasuya’s 1:14 ratio, split one-third for the bloom and two-thirds for the steep.
Grind. Grind 20 g a little finer than you would for a standard pour-over.
Rinse. Seat the paper filter in the Switch, rinse with hot water, discard the rinse.
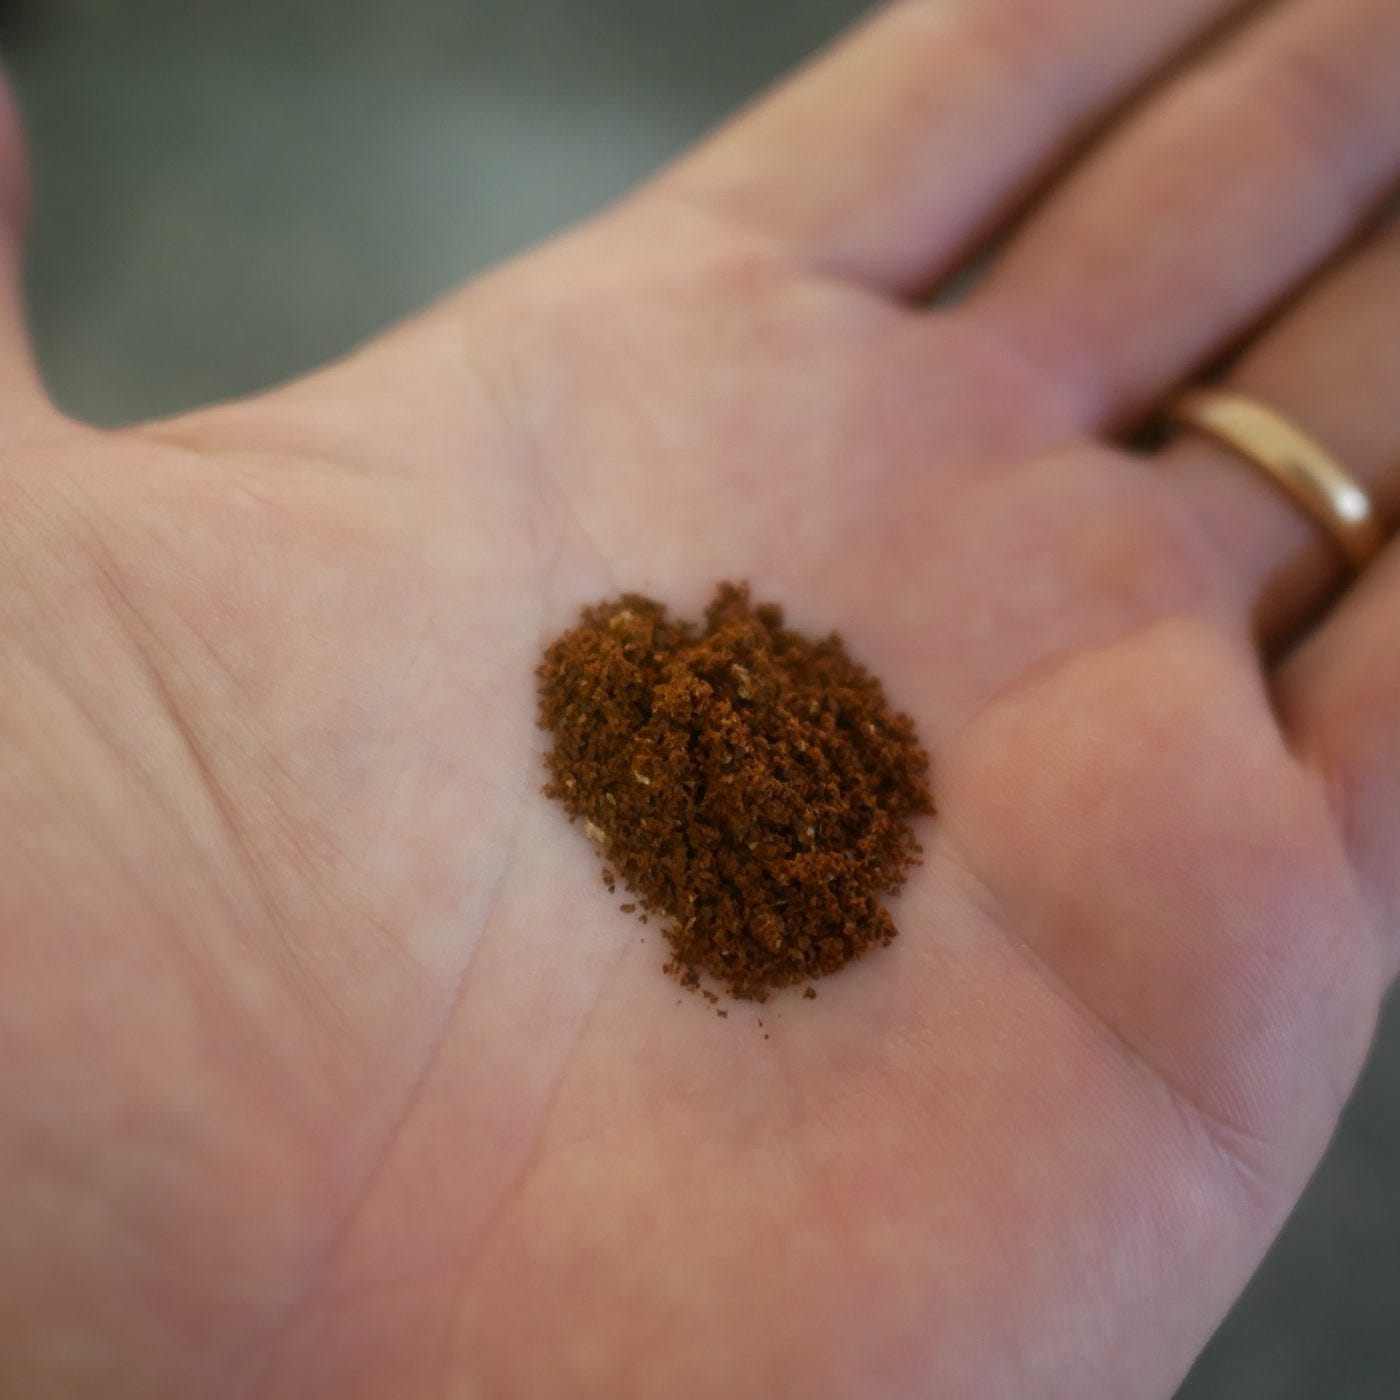
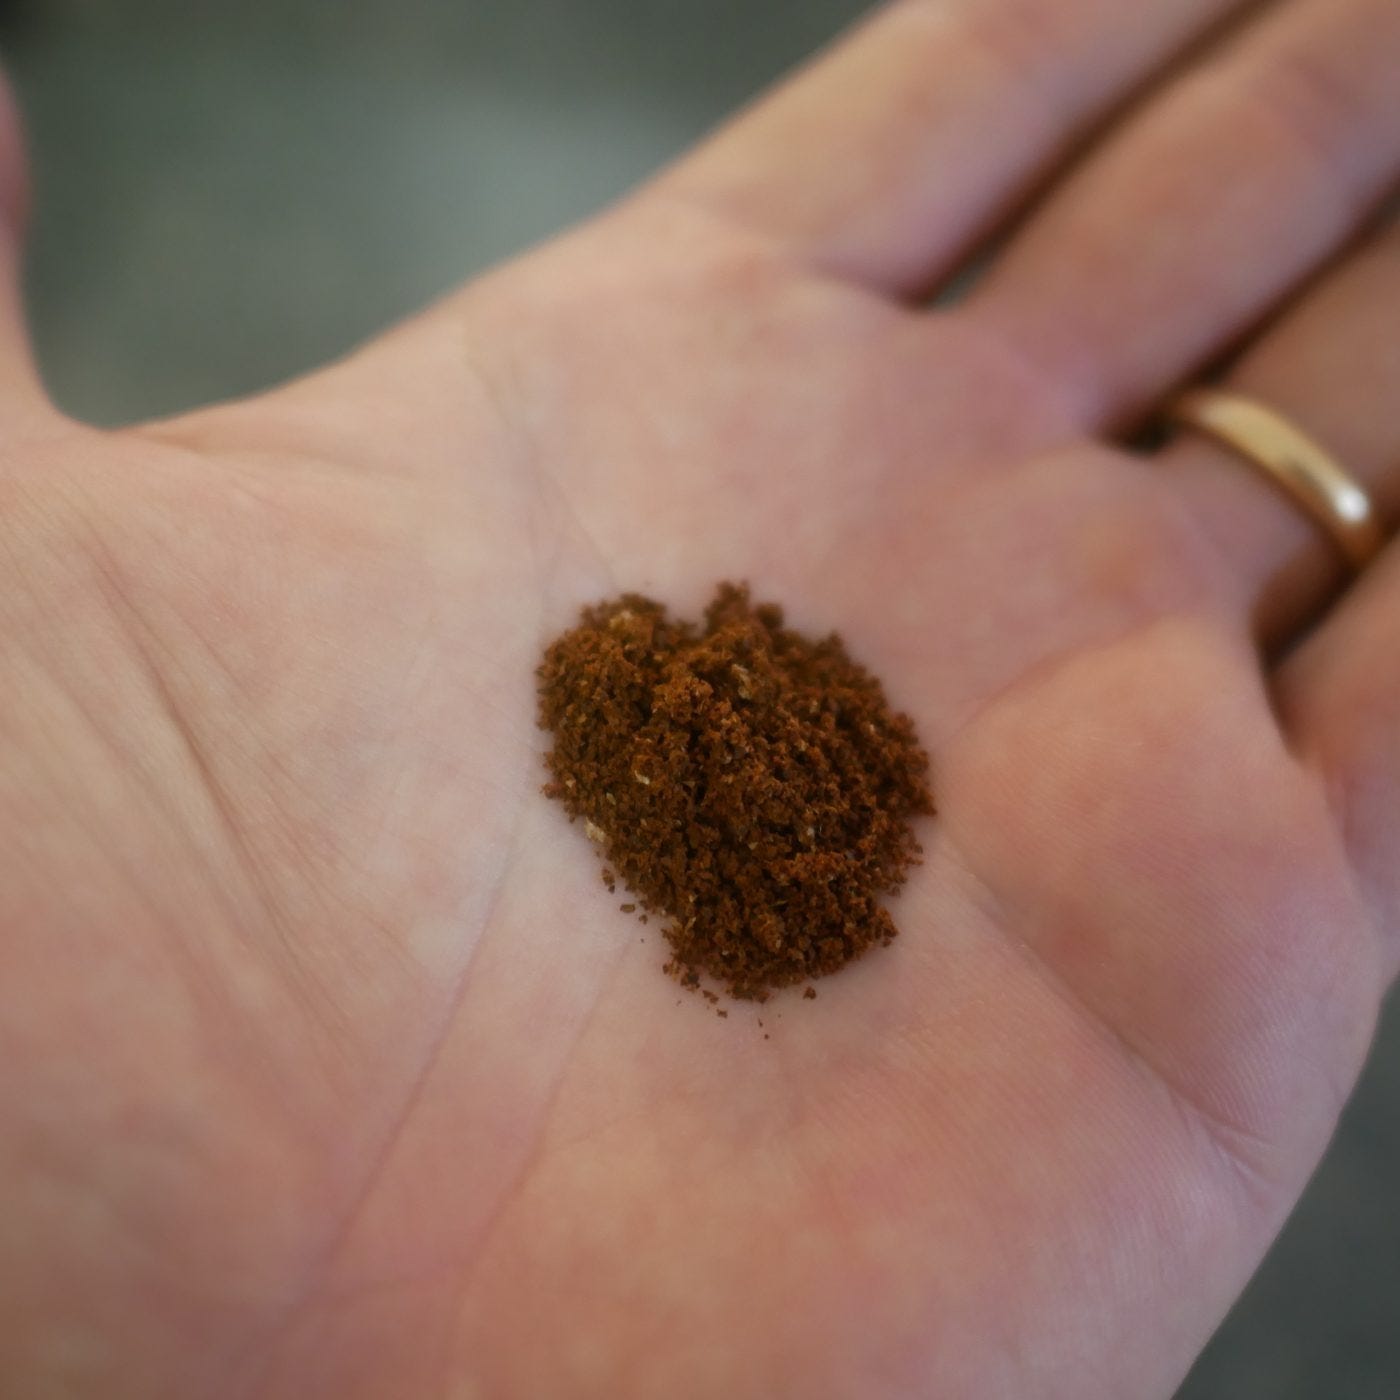
The correct grind size to be used with this method - slightly finer than conventional French press or pourover. Bloom, 205°F / 96°C, valve open. Pour about 93 g, a third of the total, over the grounds. Let it drain all the way through and stop.
Steep, 192°F / 89°C, valve closed. Close the valve and pour the remaining water to 280 g total. Let it steep, submerged, for 3 minutes. If you’re feeling sassy, give the slurry a gentle stir.
Open and drain. Open the valve and let it draw down. If it drains slowly, grind coarser next time; if it races through, go finer. Drawdown should take about 60 seconds.
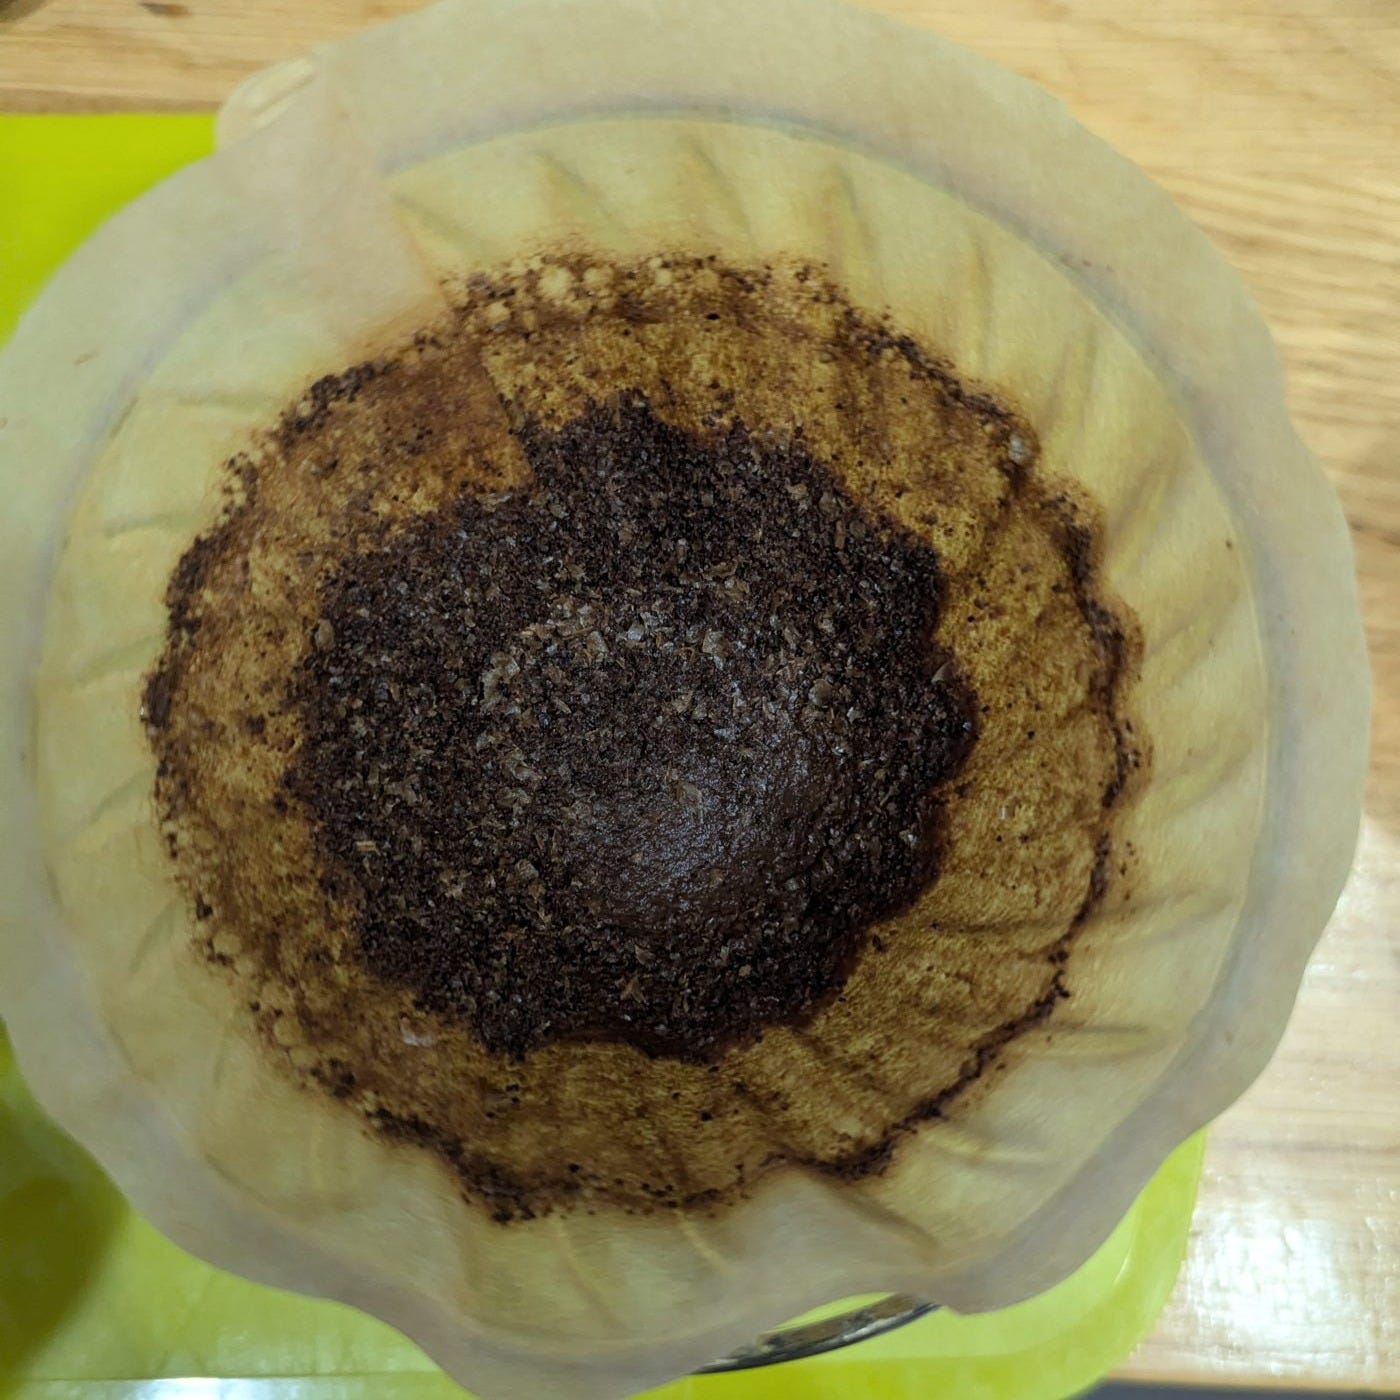
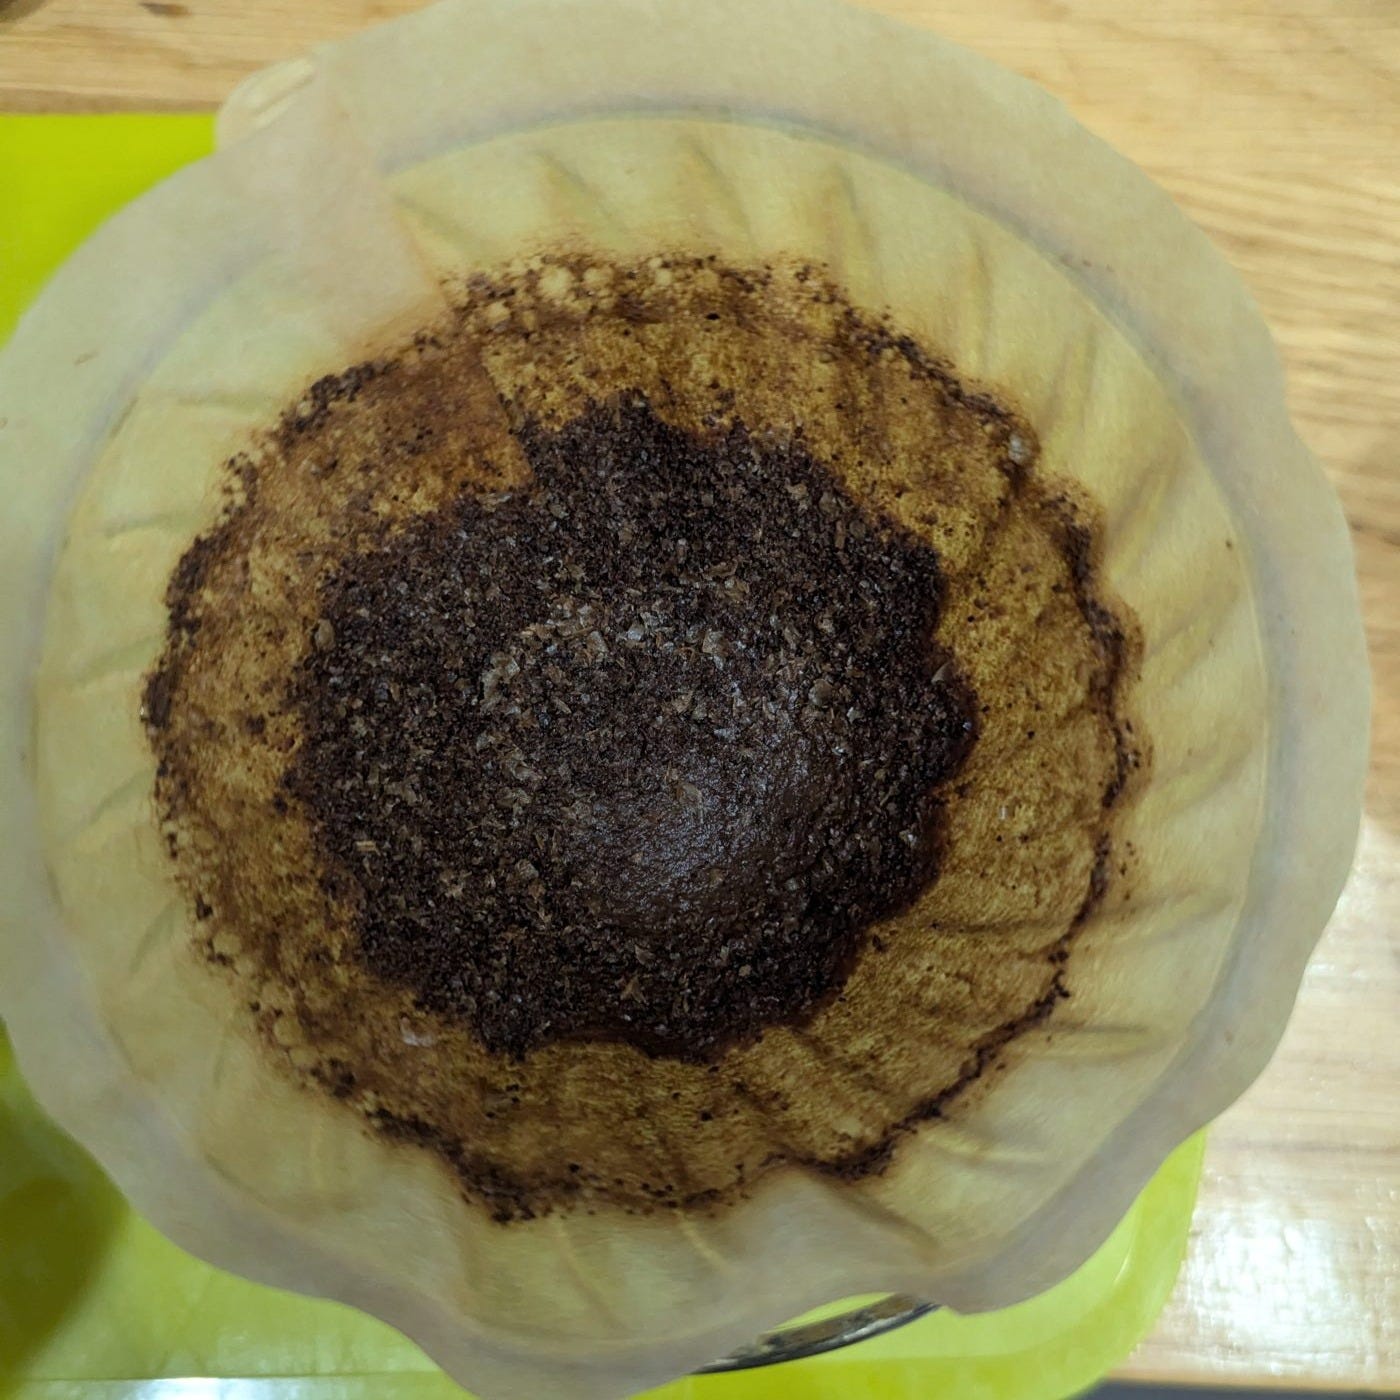
What the spent bed should look like after drawdown. Pour from height (Optional but strongly recommended). Decant from a foot up, the way mint tea is poured in Morocco (image below). This last bit aerates your coffee in the same way similar processes open up and round out the flavors in the same way it does for wine or Moroccan tea.
Enjoy. You’ll likely find that you need no milk or sugar if these are things that you add regularly.
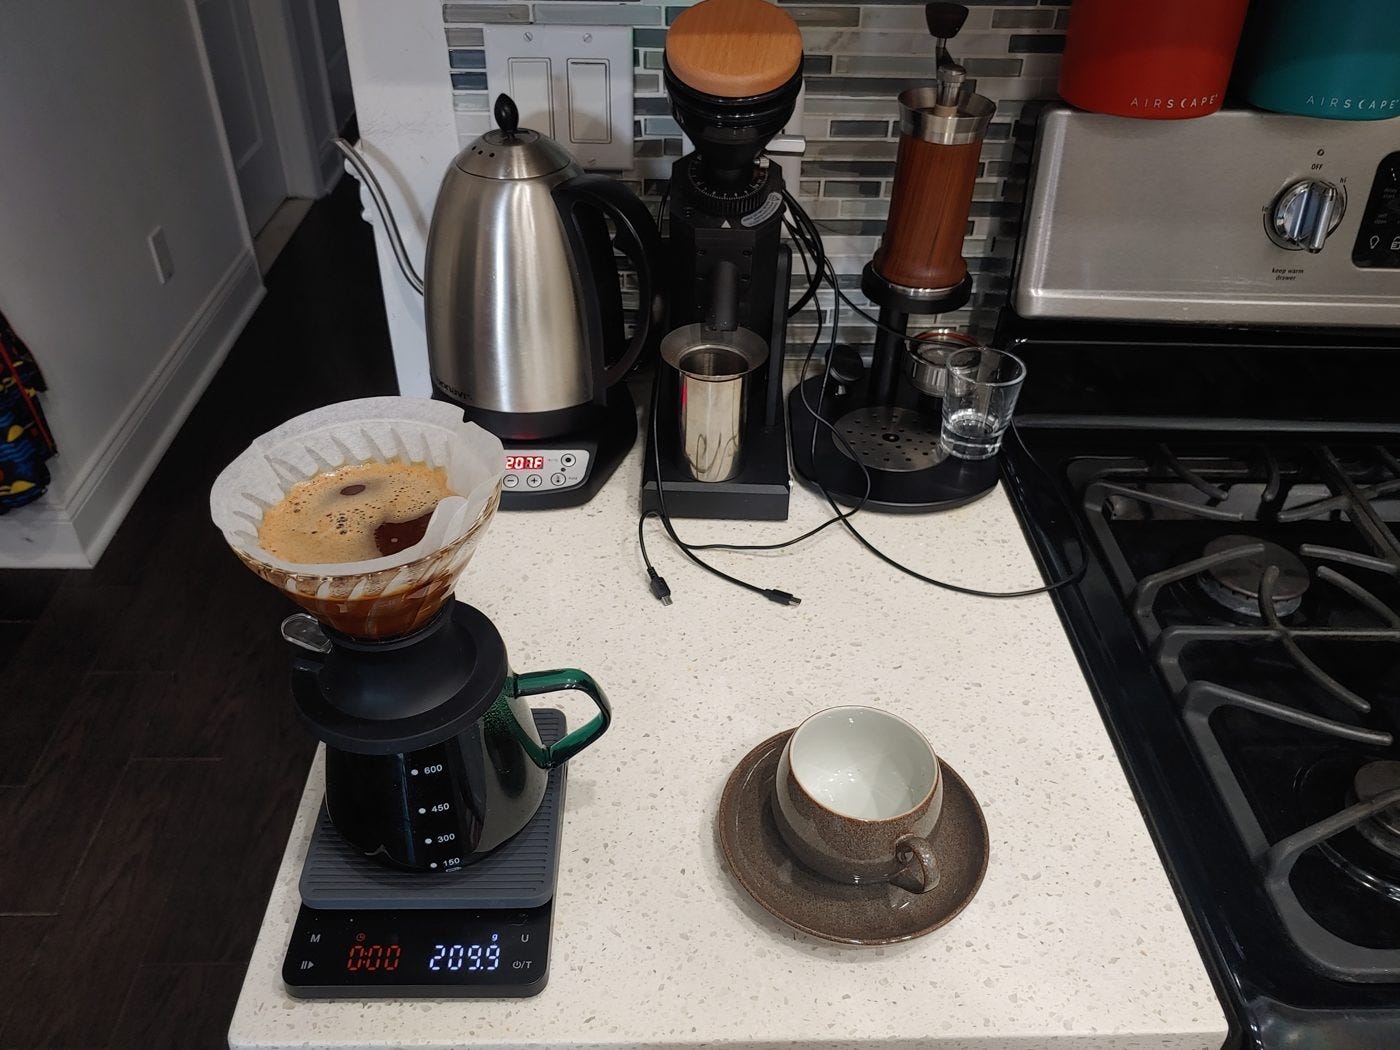
A first note on temperature. If you don’t have a temperature controlled kettle, just do both steps at 200F and time your kettle. When I was in law school 15 years ago, I knew that my simple electric kettle dropped to 200F right at 4 minutes after having come to a boil if I took the lid off. I used that knowledge together with the microwave kitchen timer to make delicious French Press without having to ever re-measure temperature. If you’re doing this experiment, also figure out the time it takes to drop to 180F - the ideal for most green teas.
A second note on temperature: my drop from 205 to 192°F is lighter, about 13°F. Kasuya’s original plunges much further, toward 70°C / 158°F across multiple pours. This is my flavor and process preference. If you want the more dramatic effect closer to his Devil Pour as published, cool the steep water further.
The Method for Iced Coffee
Keep the same coffee-to-final-liquid ratio, but let ice in the server supply part of the water instead of the kettle. As a starting point, aim for the ice to supply about 40% of the finished drink.
In practice that means 20 g coffee : 170 g hot water through the brewer (the same bloom-then-steep structure as the hot cup, just to a lower total), dropped onto 150 g of ice waiting in the server. Two things make the exact final ratio fuzzy, and both push the drink stronger than the nominal numbers suggest:
Bed retention. The grounds hold roughly 1.5 to 2 g of water per gram of dry coffee, so 30 to 40 g of your 170 g never reaches the server.
Variable melt. How much ice melts depends on cube size, starting temperature, server mass, brew temperature, room temperature and how long you swirl.
So the served drink may land closer to 230–250 g than 280, and stronger than 1:14. Chilling also changes perception: it suppresses aroma release and shifts the balance of acidity, bitterness and sweetness, so a chemically identical brew can read as less expressive: quieter, though no weaker in concentration.
If you want to get fancy, you can also replace the coffee server with a cocktail shaker and get a result that has a mouthfeel similar to a Guiness.
Load the server. Put 150 g of ice in the Hario server, and set the Switch on top. The brew will fall straight onto the ice.
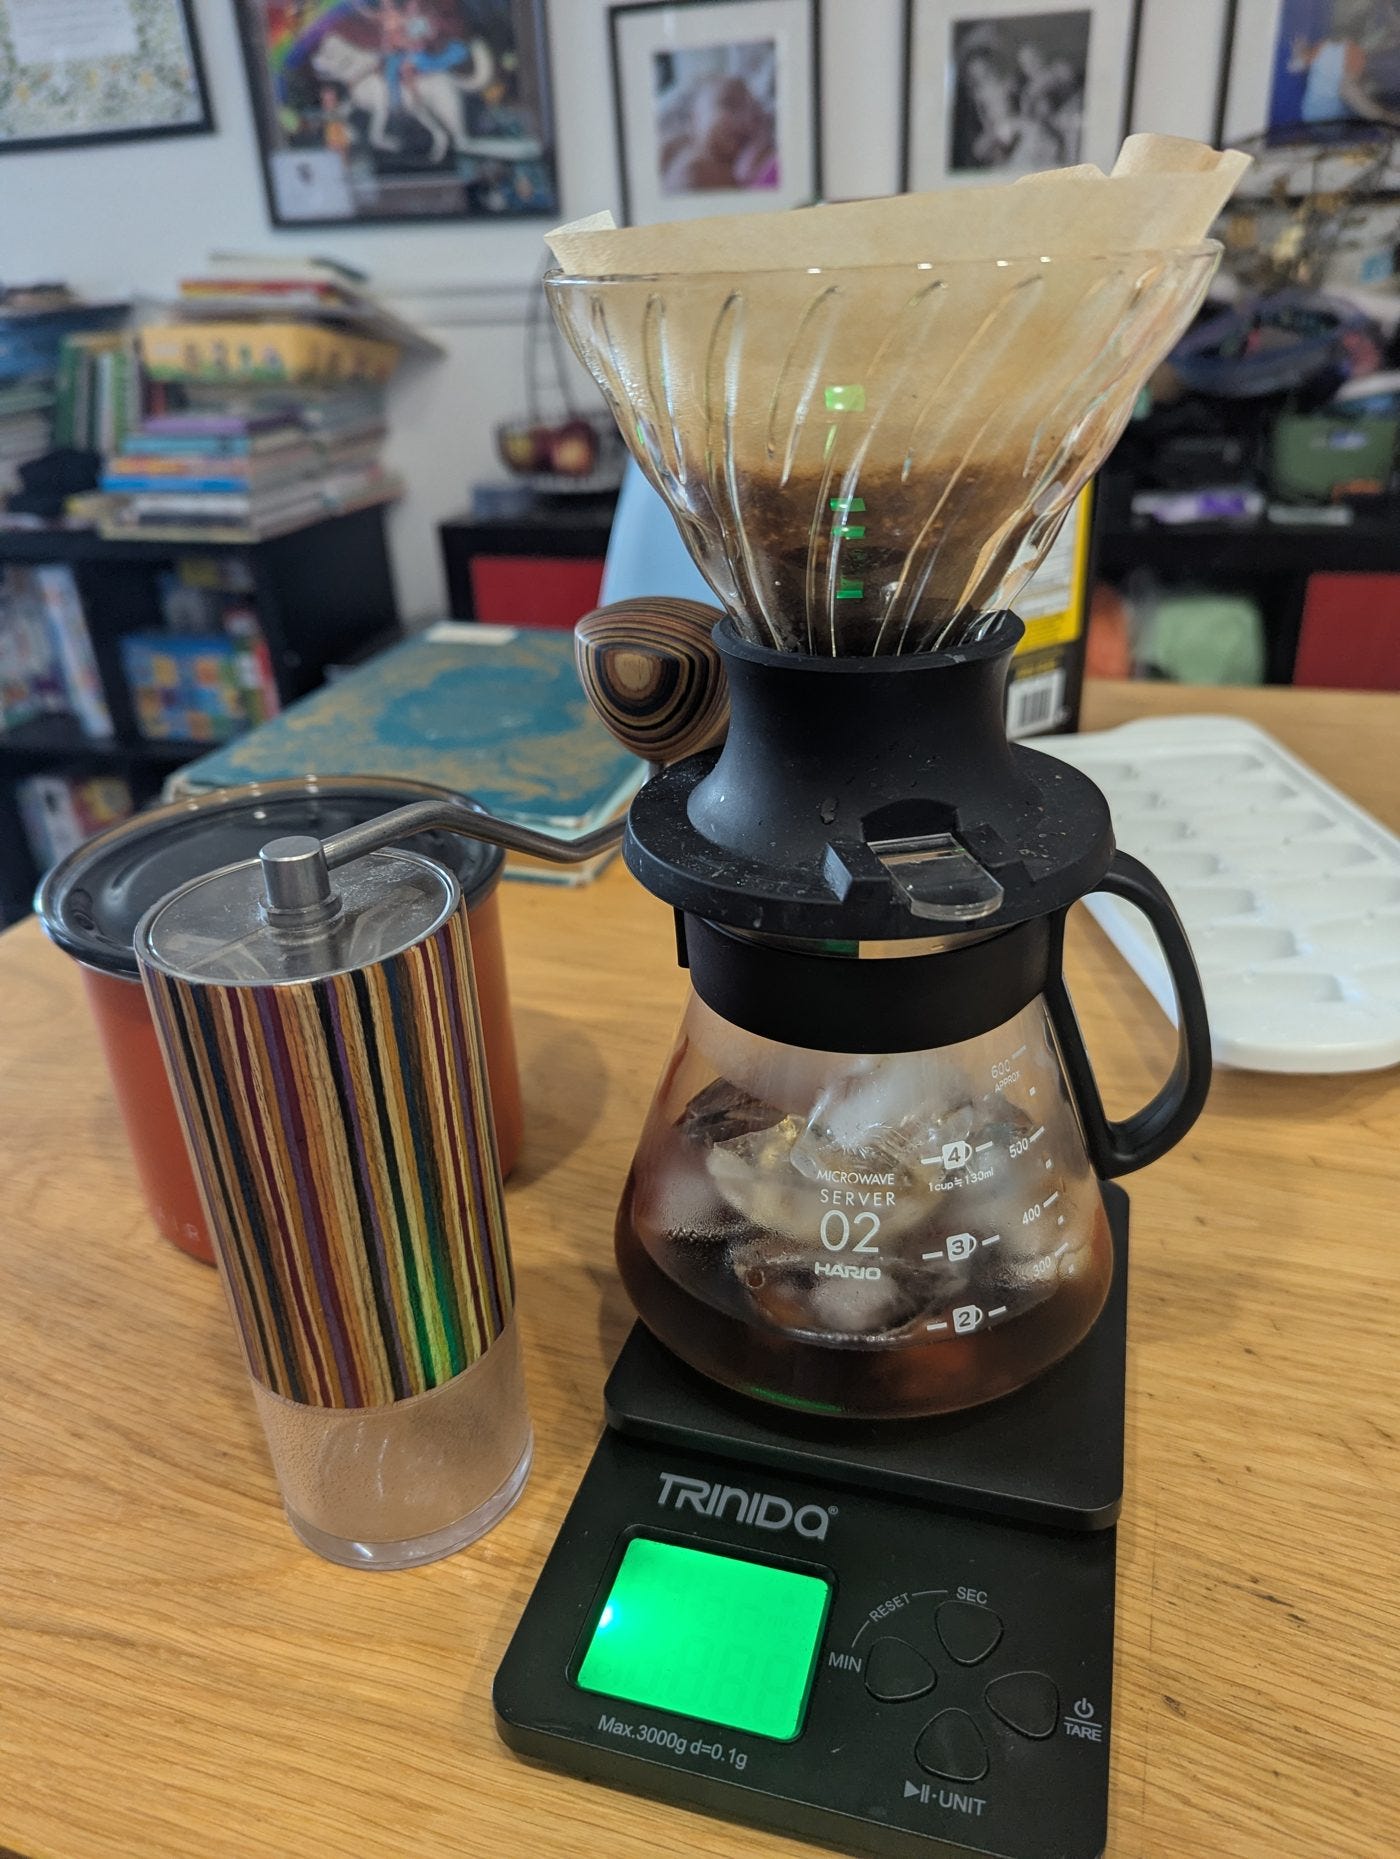
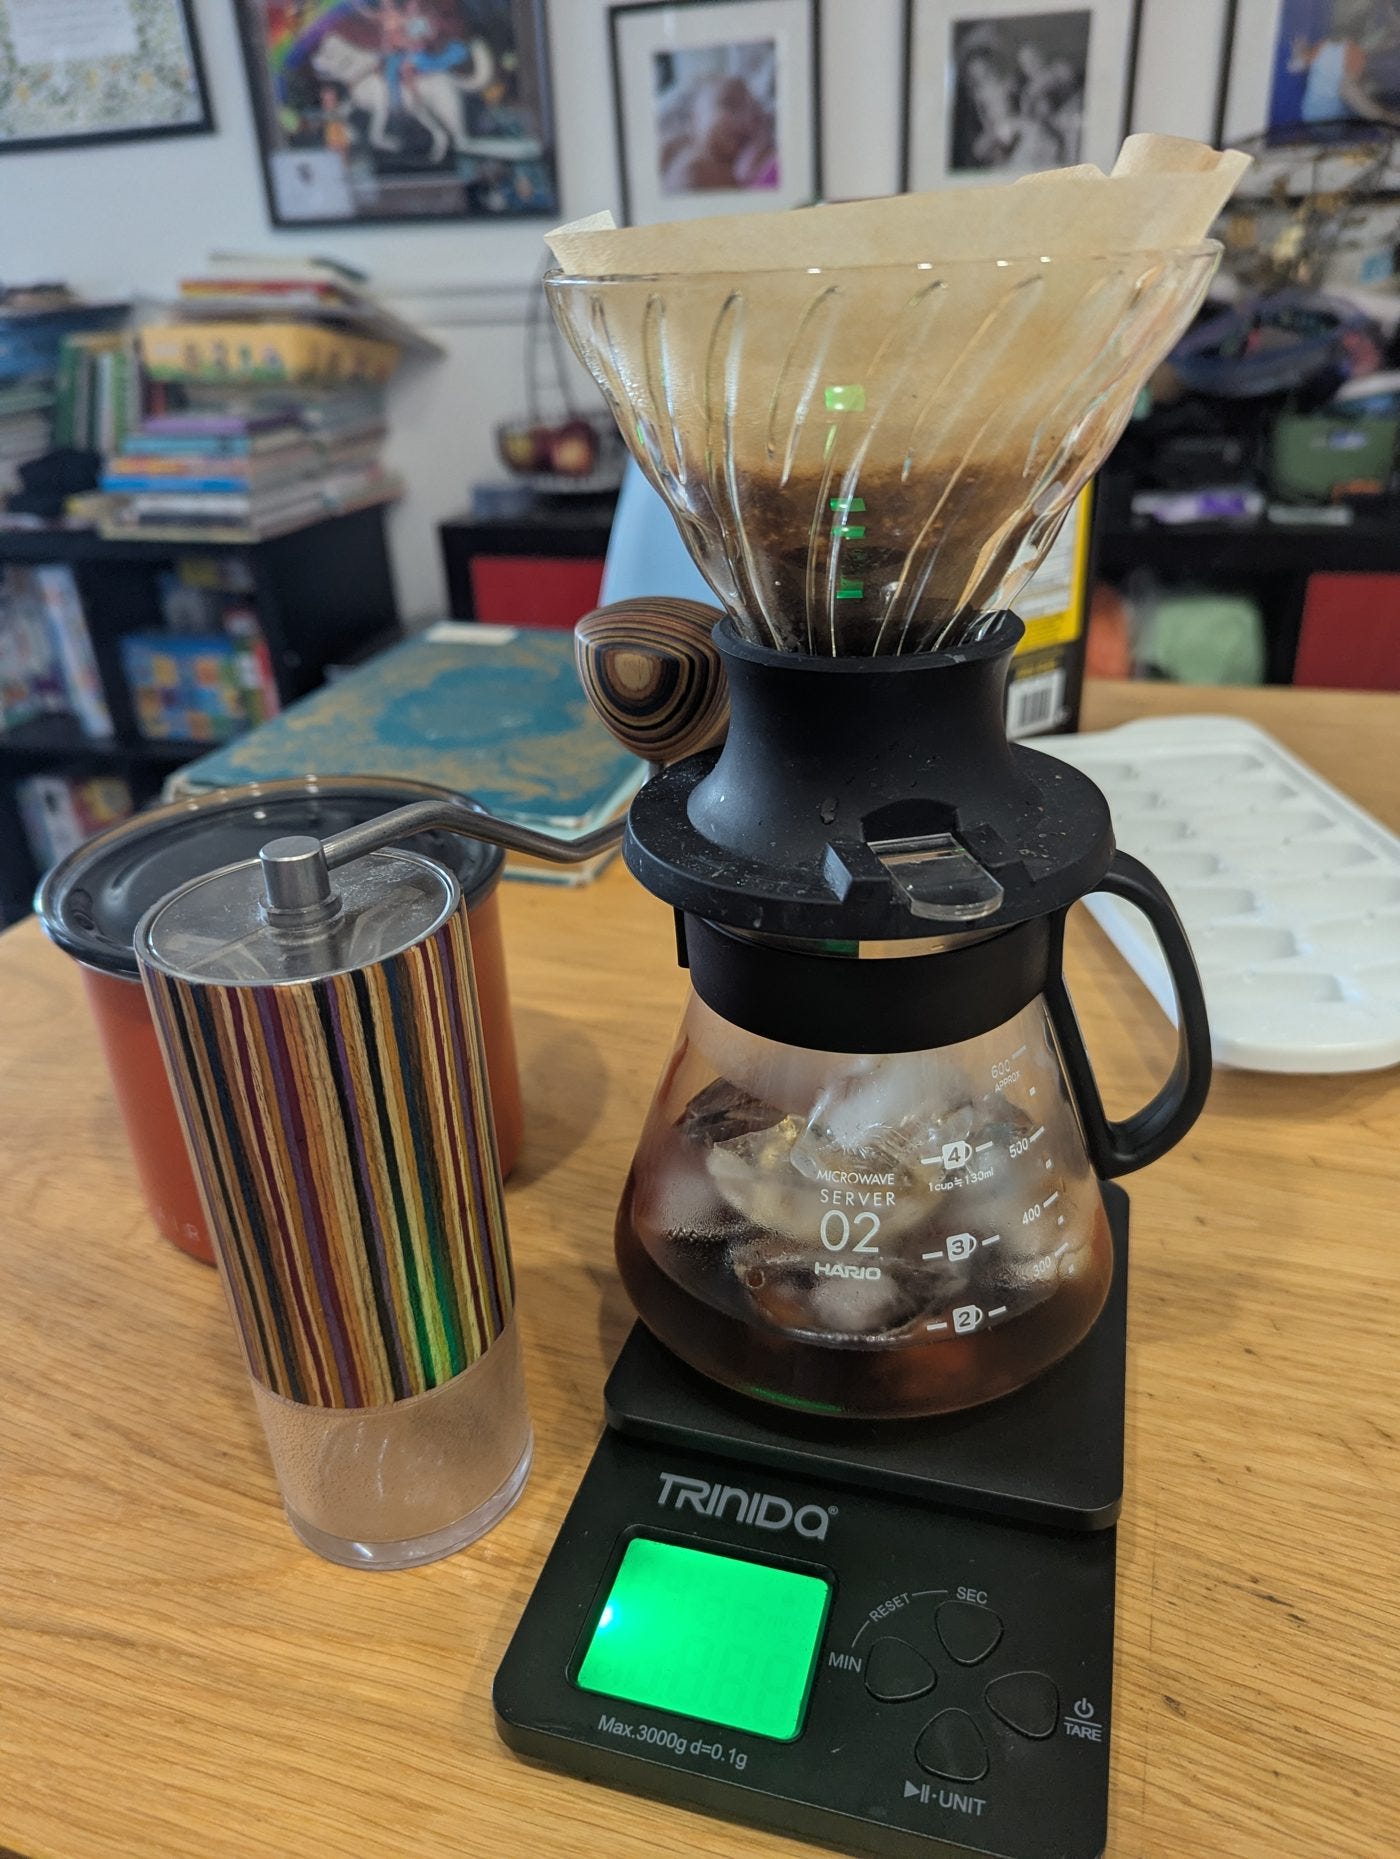
Iced setup: ice loaded in the server, everything on the scale, ready to brew straight down onto it. Grind and rinse. Grind 20 g a little fine. Seat the paper filter, rinse with hot water, discard the rinse.
Bloom, 205°F / 96°C, valve open. Pour about 57 g, a third of the 170, over the grounds and let it drain through. Hotter water up front favors the bright aromatics, and since chilling mutes acidity, you want that brightness.
Steep, 192°F / 89°C, valve closed. Close the valve and pour the rest to 170 g total. Steep 3 minutes.
Open and drain onto the ice. Open the valve and let the brew draw down into the iced server. Swirl to melt the ice evenly and chill the drink.
Pour off into a glass. Once cold, decant into a separate glass, leaving the surviving ice behind in the server. If using a cocktail shaker, cap it and give your drink a vigorous shake before filtering into a glass. This stops further melting so the cup holds its strength instead of watering down. Add fresh ice to the glass if you want it colder.
Why the order matters
Coffee gives up its compounds in a loose sequence, and that sequence is the lever this method leans on. Acids go early, small and highly soluble; one study notes plainly that most acids in coffee extract quickly. [1] Soluble carbohydrates and the caramel-and-nut compounds follow, and the heavier, more bitter material comes later and slower.
That is a teaching model; the real chemistry is messier:
Acids, carbohydrates, caffeine, volatiles, melanoidins and bitter compounds all extract concurrently rather than in orderly waves.
“Bitterness” is a sensory output of several compounds rather than a single late fraction; some chlorogenic acids suppress bitterness rather than cause it. [13]
Roast level and origin can shift the whole system more than the temperature profile does.
Temperature sets the pace. Higher water raises both the rate and ceiling of extraction; an infusion study measured caffeine climbing steadily across 80, 85, and 90°C (176, 185, 194°F), following first-order kinetics. [2] Cooler water slows extraction, and slows it most for the slowest, least-soluble material. A cooler steep should ease the back half down and limit the rise of harsh, bitter notes while the cup keeps building. In my everyday version the drop is small (205 to 192°F, about 13°F), so this is a light lever; Kasuya’s deeper plunge toward 70°C / 158°F leans on it harder.
A caveat runs the other way. Some controlled drip work found that once brew strength and extraction yield are held constant, temperature itself has little independent sensory effect. [14] Temperature may matter mainly because it changes extraction rate and final yield rather than because cooler water selectively refuses bitter molecules. In this recipe temperature, contact mode and extraction trajectory all change together, so none of them is cleanly the cause; in my low-gradient version, the long three-minute immersion and the fully-drained bloom do most of the work.
One more point the recipe depends on: these are kettle temperatures, not slurry temperatures. The bed is cooled by wet grounds, the dripper, retained brew, and the air; the coffee itself follows a smoother, lower curve than the numbers suggest, and the shift from bloom to steep is a transient rather than a clean step.
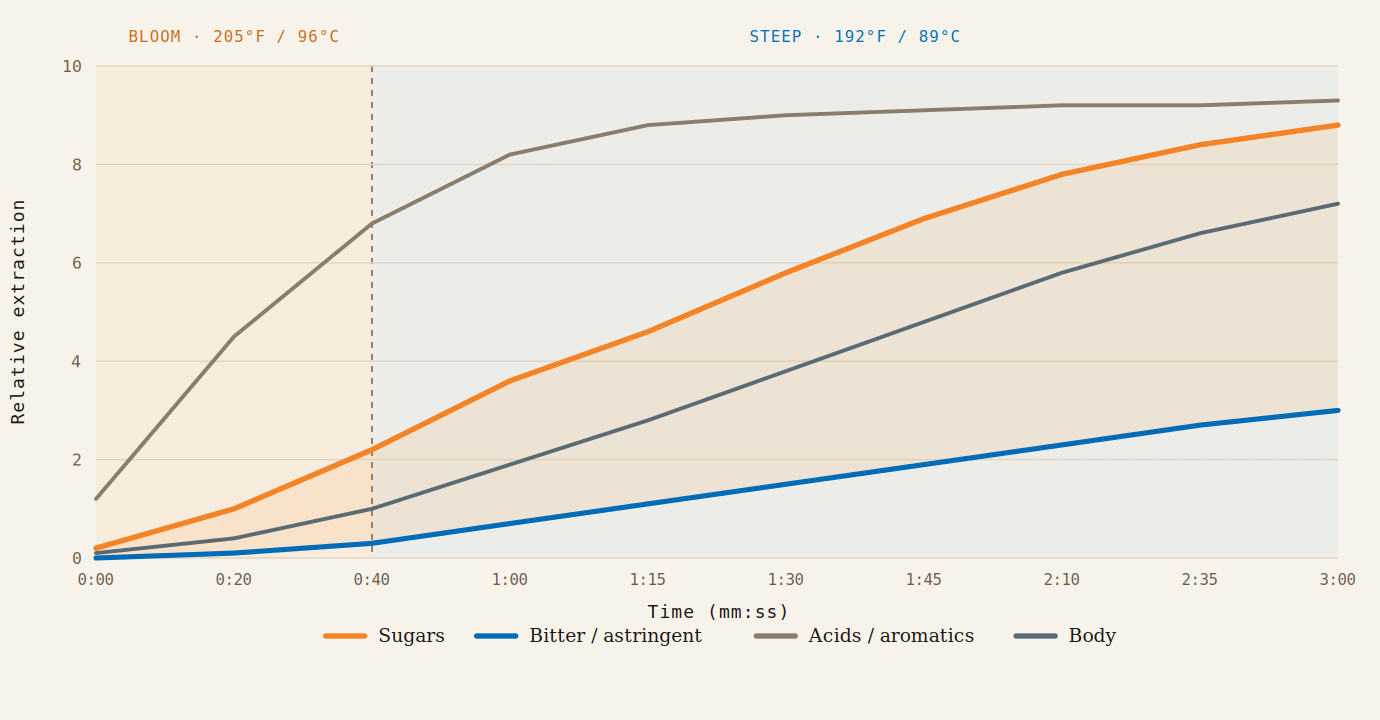
Why not brew cool the whole way? You would lose the top of the cup; hotter water extracts and releases aroma-active compounds faster, and brings out a brighter aromatic profile. The Devil spends its hottest water where heat helps and switches to cool before the back half turns harsh. The one study that brewed coffee under deliberate temperature gradients points the same way: Salamanca and colleagues found the temperature path measurably changed which compounds reached the cup and could highlight or hide sensory attributes. [3] That was espresso with a smaller gradient, so it points the way without proving it; the principle is the one Kasuya found by taste.
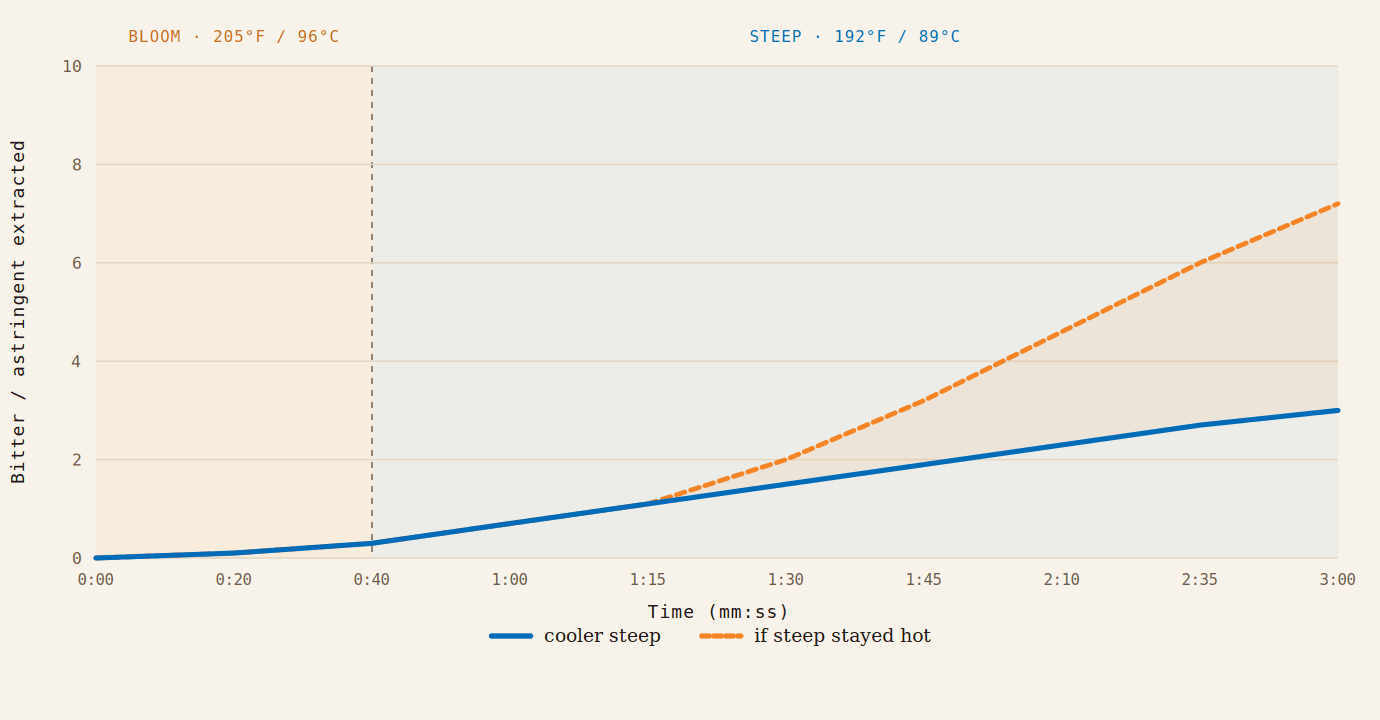
Where the body comes from
The Devil’s cup is thick and round, and the temptation is to credit the temperature trick. Body is mostly physics: suspended fines, emulsified oils, colloidal material, all set by method and grind rather than by the temperature curve. A 2025 review catalogs body, viscosity, and lipid content as properties of the brewing technique itself. [4] The recipe’s finer grind means more fines in suspension; the long immersion keeps oils mobilized. If your cup is thin, grind finer or steep longer. The thermometer is the wrong lever for body.
Freshness: the window before you brew
TLDR: In my experience, coffee tastes best between day 5 and 15 after roasting. This is the biggest reason I roast weekly: so that my coffee at home is always in the tastiest part of the flavor curve.
The best method cannot rescue beans brewed at the wrong moment in their life, and “fresh” is more complicated than it sounds. Coffee straight off the roaster is not at its best. Roasting traps carbon dioxide in the bean, and for the first few days that gas fights your extraction: it repels water, destabilizes the pour, and throws a sharp, slightly carbonic edge over the cup while muting sweetness. The bean needs to rest and off-gas before it brews cleanly. But wait too long and the opposite problem takes over: oxygen stales the coffee, lipids oxidize, and the aromatic compounds that make it worth drinking quietly leave.
The window you want sits between those two time-driven processes.
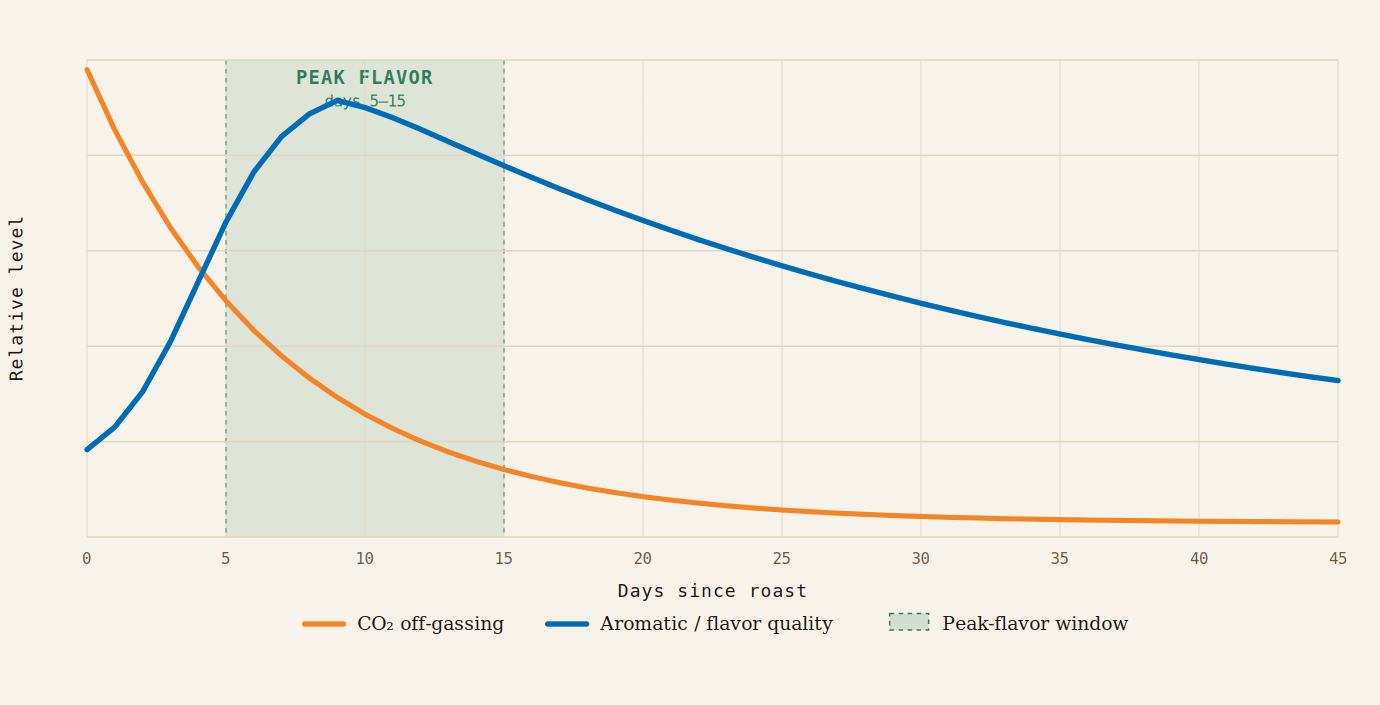
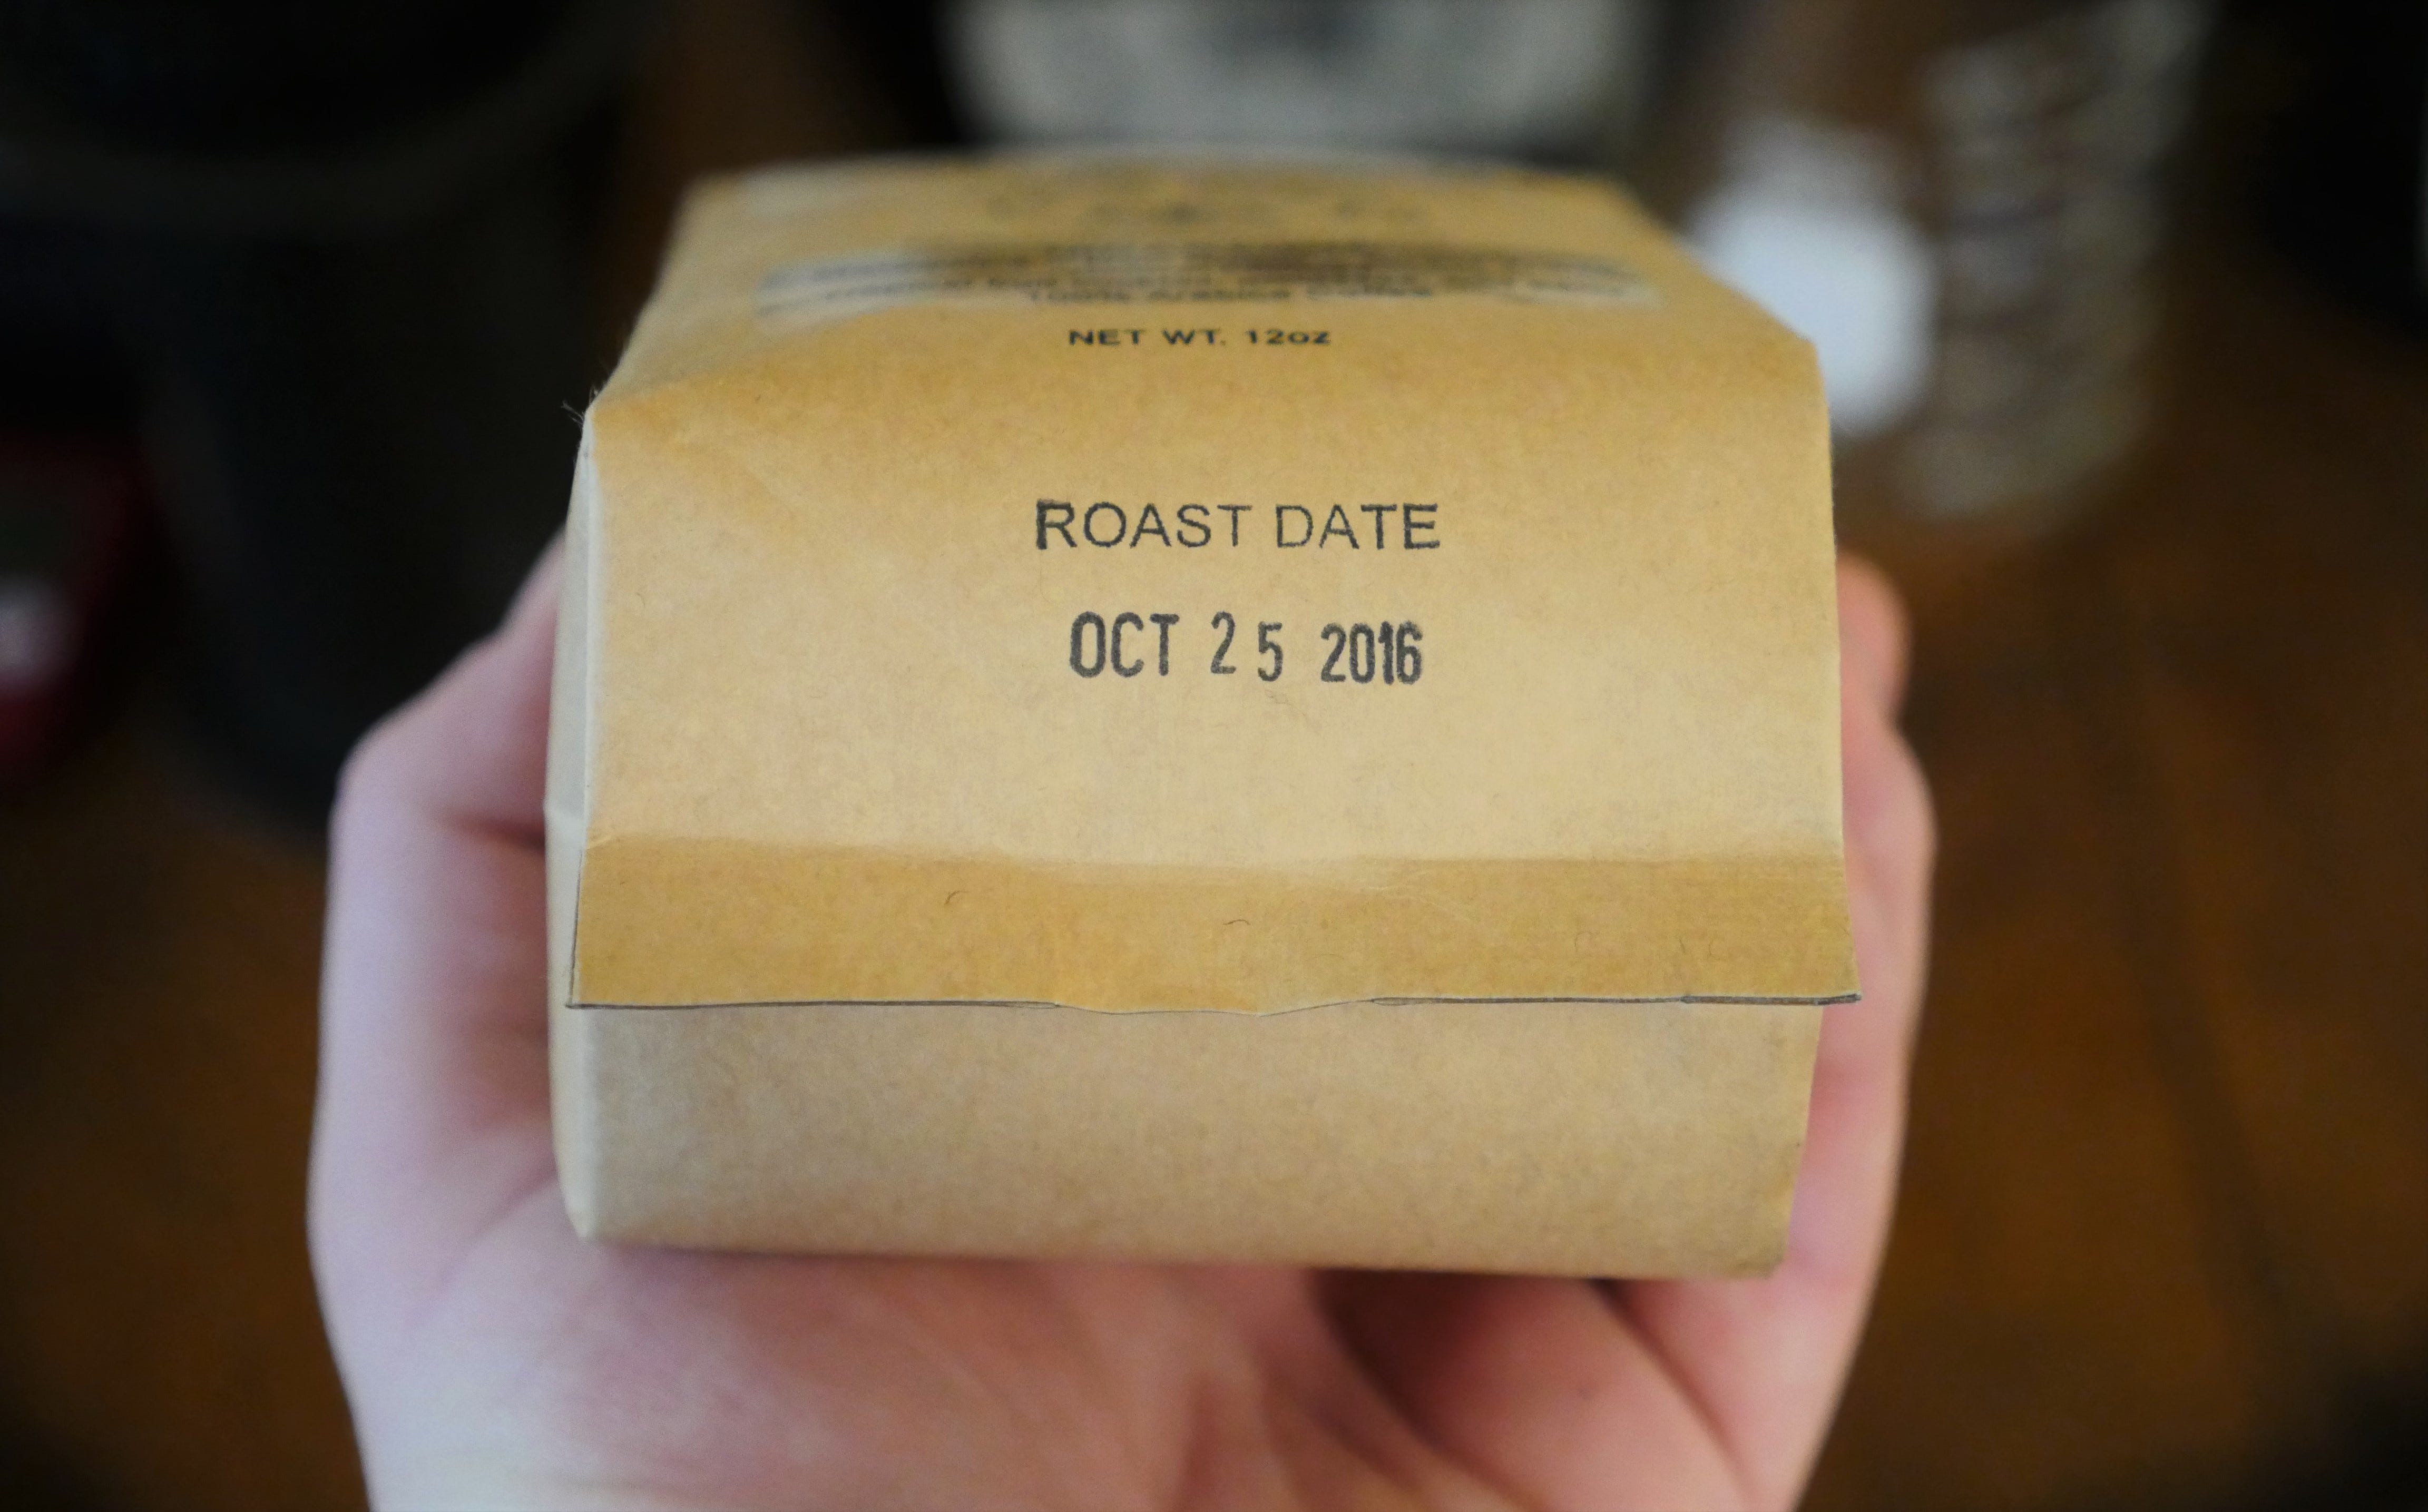
Most better roasters across the country will print their roasted-on date right on the package. This is the one that matters.
The high pour
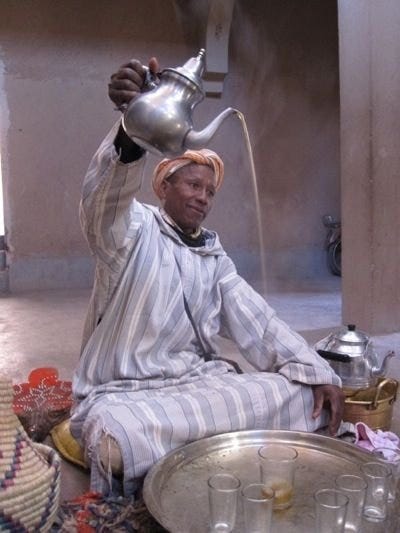
The last move has the least published science under it, but the clearest result at my own table.
Poured from height, the stream breaks turbulent and folds in air, and to my nose the cup arrives with a lift of aroma off the surface. The physics is understood, if not specifically for coffee: aroma reaches your nose only when volatiles leave the liquid, and agitation drives that transfer. It has been measured directly: in a model liquid, a higher stirring rate increased volatile release into the headspace, while thickening the liquid slowed it. [10] Agitation is itself a studied variable in flavor science. [11] Disturb and spread the liquid and more volatiles go airborne, the same reason wine is swirled.
I could find no study that isolates pour height itself in coffee. What I have instead is a result from my own table and palate that you can reproduce at home to see what you prefer.
A note on why this, of all things
My uncle, a materials scientist, has a theory about why so many scientists, engineers, and physicians end up obsessive about cooking. The work spans precision and art at once: it rewards measurement and technique, but the result is sensory, and you cannot fully specify it in advance. It is intensely tactile in a way most of our professional lives are not. And it pays out on a timescale our actual work almost never offers, a result you can hold and taste in minutes or hours rather than quarters or years.
The Devil, it turns out, is in the timing.
Recipe: Tetsu Kasuya’s “Devil” recipe for the Hario Switch (2024 version). A later “Super Hybrid” evolution followed in January 2025; the principles apply to both.
References
Fuller, M. & Rao, N.Z. (2017). Scientific Reports 7:17979. Open access, verified from full text. Cold-brew study; cited for extraction order and acid solubility, not hot-brew magnitudes.
Taip, F.S., Abdul Ghani, N.H. & Othman, N. (2025). Food Research 9(2):32–39. Verified from full text. Infusion at 80/85/90°C (176/185/194°F); caffeine rose with temperature, first-order kinetics.
Salamanca, C.A. et al. (2017). “Extraction of espresso coffee by using gradient of temperature.” Food Chemistry. Rising vs. falling vs. fixed profiles. Paywalled; claim from abstract and secondary review, full figures not retrieved.
Baiano, A. (2025). Beverages 11(5):125. Open-access review; body, viscosity, lipid content as method-dependent. Cited from abstract.
Mechanism per the diterpene-filtration literature (note 9): the paper filter’s principal function is retaining the fine particles that carry compounds out of the brew, the same particles responsible for grit.
Established finding that paper filters retain cafestol and kahweol while metal, nylon, and mesh filters do not.
Controlled studies: regular unfiltered (boiled) coffee raises serum cholesterol; filtered does not. Reflected in the 2023 Nordic Nutrition Recommendations.
Iggman, D. et al. (2025). Nutrition, Metabolism and Cardiovascular Diseases (S0939-4753(25)00087-0). LC-MS: paper-filtered home coffee ~12 mg/L cafestol, ~8 mg/L kahweol; French press and percolator ~90 / ~70 mg/L. Verified from abstract across PubMed and journal.
Most cafestol is retained on grounds and fine particles rather than the paper itself; the paper’s principal role is blocking the particles carrying the compound. Per nutrition-science summary of the primary studies.
“Dynamic Release of Diacetyl from Liquid Gelatin in the Headspace,” J. Agric. Food Chem. (1998). Higher stirring rate increased volatile release; higher viscosity decreased it. Model liquid, not coffee; cited for the agitation→release mechanism.
Weterings, M. et al. (2022). “The influence of agitation on aroma release.” Innovative Food Science & Emerging Technologies 75:102610. Topic reference; cited from indexing.
Cocktail/dispense guidance advising slow pours and minimal agitation to limit volatile loss. Trade source, non-peer-reviewed; practitioner corroboration, not primary evidence.
“Identification of coffee compounds that suppress bitterness of brew,” PubMed (2021). Some chlorogenic-acid-derived compounds suppress, not cause, perceived bitterness, complicating any clean “late bitter fraction” model.
Cotter, A.R. et al. (2023). “A new Coffee Brewing Control Chart relating sensory properties and consumer liking to brew strength, extraction yield, and brew ratio,” PubMed. In drip brewing, much of temperature’s apparent sensory effect diminished once strength and extraction yield were held constant. Cited as the counterweight to a temperature-as-dominant-lever reading.
Cotter, A.R. & Hopfer, H. (Penn State, 2018/2019). Headspace GC-MS study of six roast levels finding that freezing beans at −20°C, particularly dark roasts, preserved aroma comparably to or better than room-temperature storage. Same lead author as the brewing control chart in note 14. Reported via Penn State / phys.org.
Coffee staling work showing that even in low-oxygen sealed pouches kept frozen, coffee still loses some volatile aroma compounds over time. Freezing slows staling rather than stopping it.
Hendon, C. et al., “The effect of bean origin and temperature on grinding roasted coffee,” Scientific Reports (2016): colder beans grind to a finer, narrower particle distribution. Practical note: coarsen the grinder a notch when grinding from frozen.
James Hoffmann, “Resting Coffee — How Long Should You Wait After Roasting?” (video). Recommends ~4–5 days for medium-roast filter, up to ~10 days for very light roasts; for espresso, ~10 days for light roasts down to ~2 days for dark. Practitioner taste-testing, not controlled study.
Scott Rao, “Resting Roasts: Is Fresher Better?” (scottrao.com, 2023). Argues there is no universal resting period: classic-drum coffee rarely benefits beyond a day or two, air-roasted coffee may want one to four weeks depending on development and machine, dark oily roasts should be drunk within about a day. Also the source for the espresso back-pressure mechanism, the bloom-as-readiness tell, and the note that vacuum-sealed freezing slows aging to months or years. Practitioner experience.